Thursday, May 19, 2016

Designing Lucy's Quilt (with Pattern Jam)


A few months after Lucy was born, I finished her baby quilt. It was the first quilt I ever made, and I still love it. However, after 5+ years, this 40"x48" quilt is a little small for my Kindergartener!

I'd been looking on pinterest and Instagram for a while, and finally found this gorgeous "Girlfriend" fabric by Ann Kelle. After looking a quilt ideas for this fabric on pinterest, I was still very uninspired, and had a hard time visualizing how it would look. Lucy did too. 

Around that same time I learned about Pattern Jam. It's a website that lets you upload your fabric and design your own quilt....for free! So I decided to try it out. First, I uploaded the Girlfriend fabric I was thinking about buying. Then I started messing around with different blocks and patterns. After each try, I would show it to Lucy, and get her approval. It was so nice to be able to show my 5 year how her quilt could look! She gave me lots of feedback. :)


We finally decide on stars. I tried a bunch of different star layouts, background colors, and border options. Again with Lucy's approval each time.


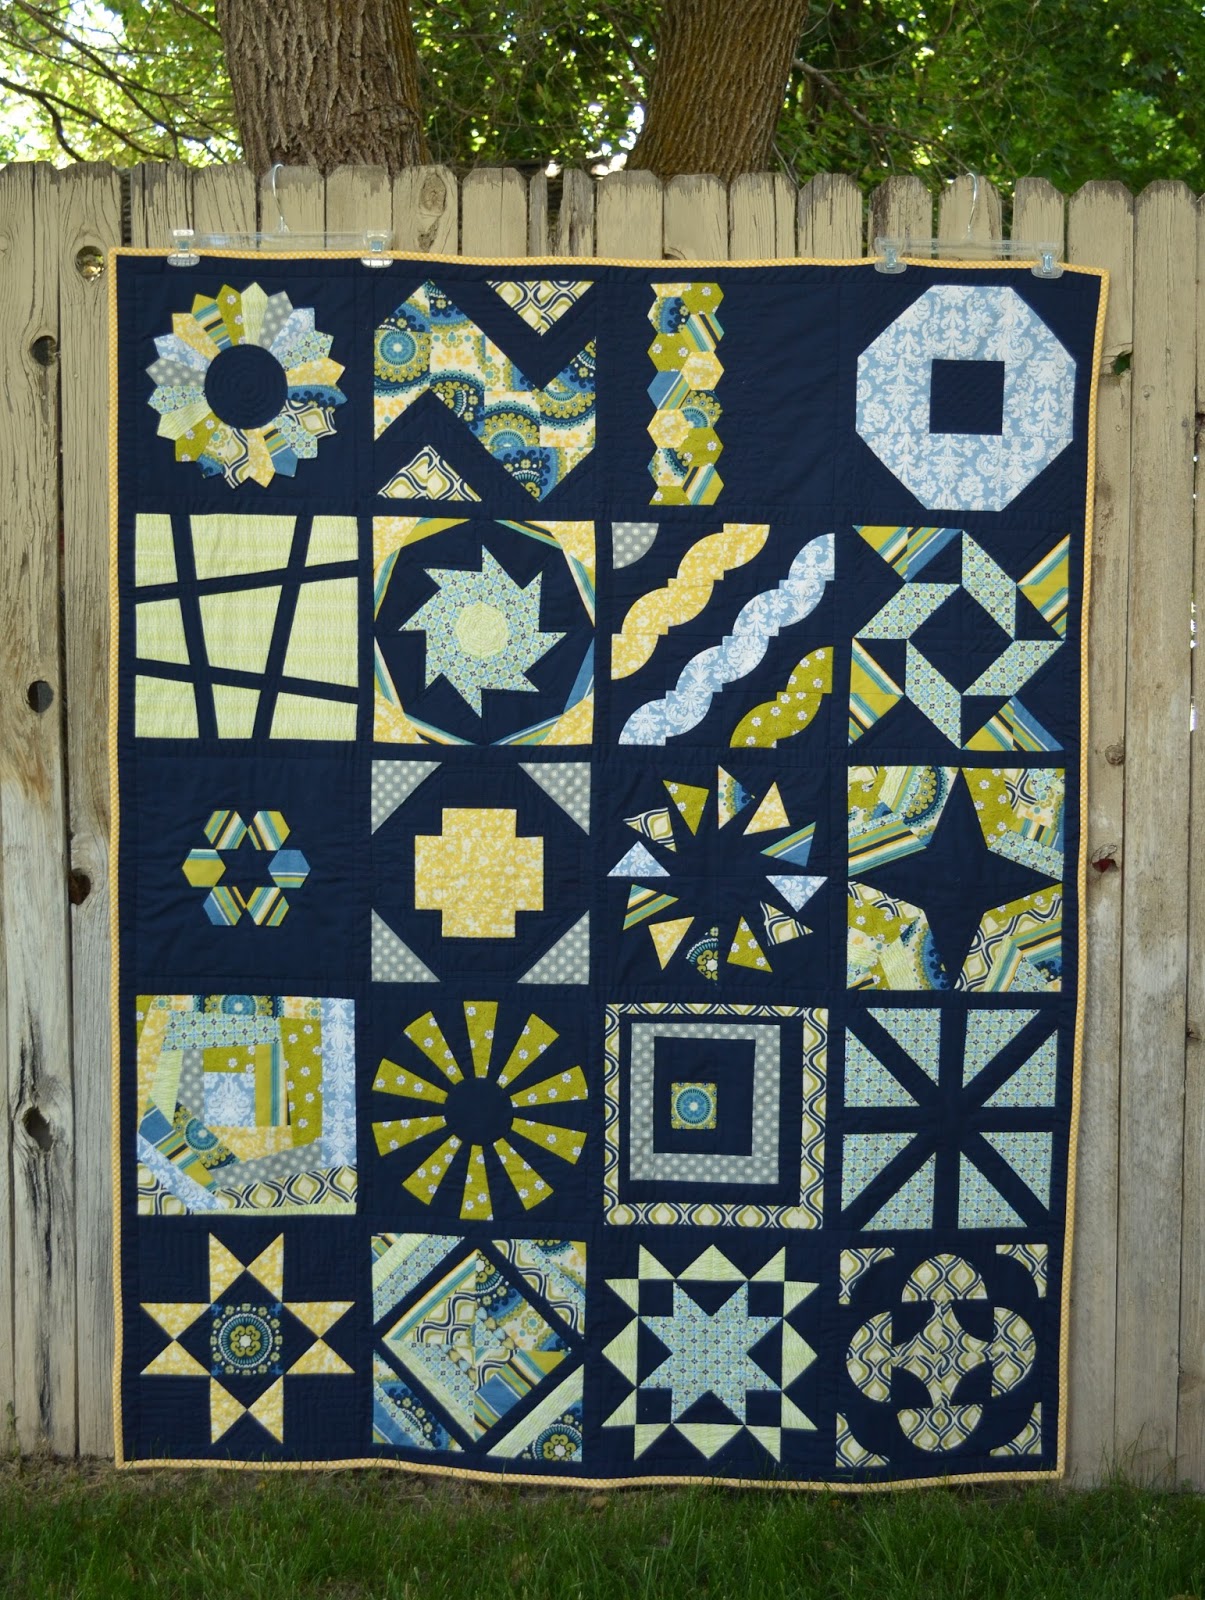
We finally settled on this design:


When I was designing this quilt, Pattern Jam only allowed you to make quilts with 12 rows and 12 columns (Now Pattern Jam upgraded to allow 16 rows and 16 columns!). Since I wanted mine to be bigger, I made this little "quilt" as an add on to make Lucy's quilt the correct size.


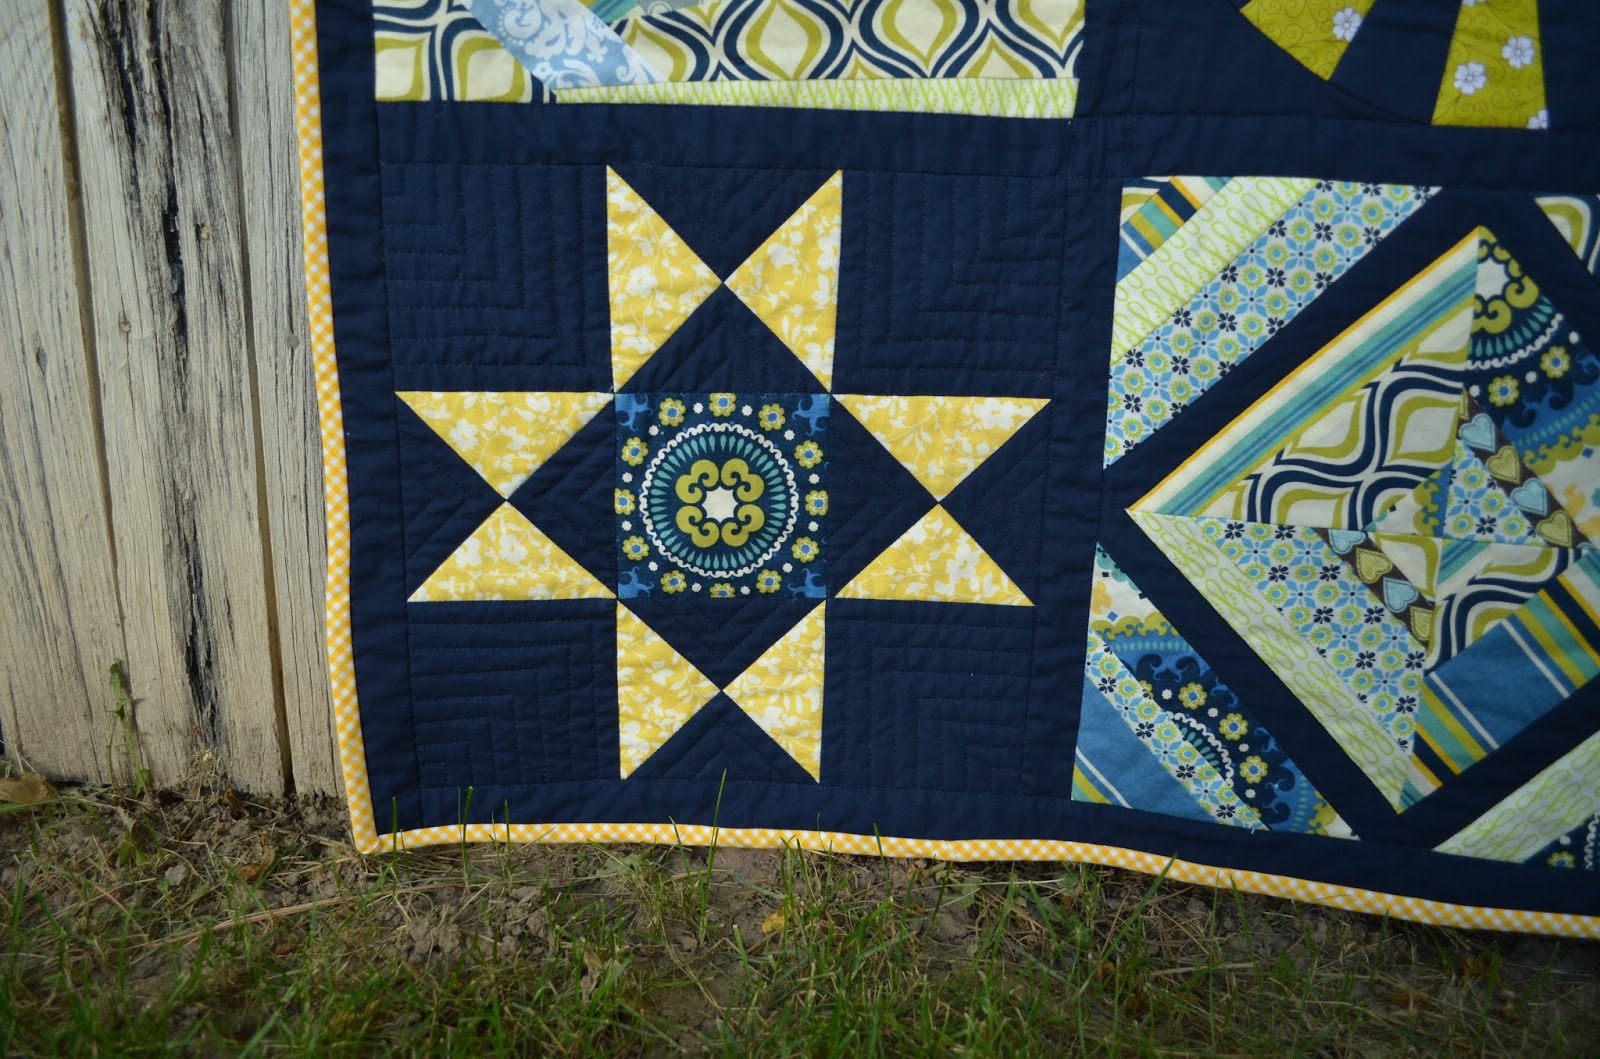
Also, since I wanted the "Girlfriend" squares to be one big 8"x8" square, not four 4" squares, I pasted the images in Microsoft Word and aligned the pieces to make this composite design.


I was finally ready to start shopping and sewing. Yay! I looked at the fabric requirements provided by Pattern Jam to verify how much fabric I needed. Their calculations were a bit more conservative than I wanted to be, so I used the "40 inch strips needed" column and did my own math from there. Note: I had to add these requirements to my smaller tack-on "quilt" for my total fabric requirements. And since I used one big square for the Girlfriend fabric, I disregarded the Pattern Jam calcs for that fabric and did my own math.


Then, Lucy and I went shopping! She helped me choose the fabric (and decided she wanted red, not purple). And after much cutting and sewing... here is the final quilt top!


Now I'm off to quilt and bind it! :)


Saturday, April 9, 2016

Les Amis baby quilt and cloth book for Ezra!

We added a new nephew to our ever growing brood! So that means I got to sew another quilt. I am so happy with how this quilt turned out. My sister lived in France, and speaks French, so of course we used a few fabrics from the Les Amis collection by Patty Slongier. So darling. I used the Arrow Tail pattern found here. The pattern was easy to follow and although cutting took a while, the quilt actually sewed up pretty fast.

Front
 I even decided to branch out from my usual tied quilts, and machine quilted this one. I love the added dimension it gave the quilt.

Front detail

Back


Back detail -- notice the French!

Trees, all sorts of forest animals, rich blues and greens, and fluffy. Perfect for a baby boy. <3 (Notice I have to live vicariously through my sisters for baby boys) :)

Ready to mail!
.
.
.
.
.
.
.
.
.
.
.
.
.

Now wait! Aren't you wondering what matching gift I came up with for the baby? Since my sister loved the French on the quilt ("Les Amis de la Foret"), I decided to make a little cloth book with French labels for sweet baby Ezra to read. I'm not going to lie -- I LOVE how it turned out. Probably one of my favorite matching gifts ever. Plus it was great practice: machine quilting (on curves, no less!), embroidery, applique, piecing, paper piecing (Butterfly pattern found here), and tiny piecing. It was time consuming, but so fun to make. Plus, as an engineer, I love finding a use for the small leftover scraps. I like to be as efficient as possible. :)


Monday, November 30, 2015

Lego Birthday Party!

Last Saturday was Lucy's lego birthday party!!! I let Lucy decide what invitations we should make. We found the idea here, and I downloaded the lego font here. They were pretty intense, but I love them. Totally worth the effort (especially since I only had to make 6). :)


It was Lucy's idea to write "Everything is awesome" on the back.


Lucy helped me make a lego banner for our living room. It turned out super cute. We had the idea to write "Lucy" on the dots instead of "Lego." Lucy wrote most of them herself. :)


The party was so much fun. First, we let the kids play with the giant castle blocks while we waited for everyone to arrive. They loved building the towers, but they especially loved knocking them down.


Then we let all the kids build cars out of legos, and raced them down the track (putting my old college research poster to good use). ;) They did a great job. It was fun to see the different cars they built.


Next was the lego pinata! All the credit for this goes to Logan. I was about ready to buy one or just put some crepe paper on a cardboard box, but Logan took the time to paper mache it and cover it with crepe paper (using this blog as a reference). I think it turned out amazing!


Next, by Lucy's request, we played pin the head on the mini-fig. I doctored up this printable so the kids could draw their own faces. I think it was my favorite part. So cute!


Next presents, and then decorating cupcakes! We used yellow frosting and had m&ms and licorice to make faces for their little cupcake mini-fig faces. It was fun -- plus who doesn't like decorating their own cupcake?


We also drew different faces on all the places. The kids loved it.

I bought some cute "party block" AKA lego treat bags at Zurchers, and filled them with matching "party block" stickers, lego candy, and these cool lego necklaces. The necklaces were a huge hit! They were the perfect little gift for these kids. Plus, the etsy seller was super accommodating and was willing to give me both pastel "friends" pieces, along with the gears and gauges (she just gave me the 9 necklaces I ordered, with a small bag filled with TONS of extra tiny pieces). I would totally buy these again.


Finally, the cake. Lucy chose everything for the cake. I think it turned out so cute! Plus it was super easy to make! It was a win-win. :) Happy birthday to my wonderful little 5 year old.

Lucy added the lego candy herself.


Wednesday, June 10, 2015

Block of the Month Quilt

Back in 2012, when I was just starting to get a little more adventurous with my quilting, I signed up for a free Craftsy Block of the Month class (and I think  you can still enroll -- so if you are interested, check it out!). It's taught by the very talented Amy Gibson. Although it took me a bit longer than the one year it was supposed to, it was a great experience, and I learned tons of sewing techniques that have helped me a lot on my other quilts (half square triangles, paper piecing, curved piecing, and quilting!)

So without further ado, here is my finished quilt!


I'm so so happy with how it turned out. Plus, it's the first quilt that I've made that I get to use for myself! :)

This was also the first quilt that I quilted myself! It was fun trying out the different techniques Amy showed in the class, and to think about quilting as part of the art of the quilt. It was definitely a learning experience! Although many of the blocks I did were very simple, here are a few blocks to show off some of my more intense quilting. :)


 And in case you are curious, here is the print I chose for the back!


 I'm so happy to have finally finished -- only three plus years in the making! :)


Monday, May 18, 2015

Baby girl pirate quilt!

Once upon a time I bought some amazing Sarah Jane "Out to Sea" fabric to make a baby quilt for baby girl #3. After debating which pattern to use, I finally decided on the adorable By Sea or By Land quilt pattern. After painstakingly cutting out all the curved pieces, I was finally ready to start sewing! Then, my worst nightmare happened: little Chi found my fabric scissors and shredded all the fabric. Worst. Day. Ever. She cut every single piece. I had to completely start over. :(

The pink narwhal fabric looked like a snowflake.

So, after buying more fabric, having Sarah Jane herself mail me more fabric (so amazing!!!!), re-cutting all the fabric, having to re-imagine the back since I now had so many scraps, I was finally able to sew, quilt, and bind it! And all with 5 weeks to spare before baby is born! Woot!

So without further ado, here is the finished quilt!

The front!

Close up of the appliqued ship

I ended up doing a much different quilt back then I originally intended since I had so many random pieces of fabric left over. I did some paper piecing to make a nautical star with my smallest scraps, and patchworked the rest. I think it turned out pretty cute!

The back!


Close up of the nautical star

I'm so happy with how it all turned out. Hopefully baby will be here to enjoy it soon! :)