Monday, November 30, 2015

Lego Birthday Party!

Last Saturday was Lucy's lego birthday party!!! I let Lucy decide what invitations we should make. We found the idea here, and I downloaded the lego font here. They were pretty intense, but I love them. Totally worth the effort (especially since I only had to make 6). :)


It was Lucy's idea to write "Everything is awesome" on the back.


Lucy helped me make a lego banner for our living room. It turned out super cute. We had the idea to write "Lucy" on the dots instead of "Lego." Lucy wrote most of them herself. :)


The party was so much fun. First, we let the kids play with the giant castle blocks while we waited for everyone to arrive. They loved building the towers, but they especially loved knocking them down.


Then we let all the kids build cars out of legos, and raced them down the track (putting my old college research poster to good use). ;) They did a great job. It was fun to see the different cars they built.


Next was the lego pinata! All the credit for this goes to Logan. I was about ready to buy one or just put some crepe paper on a cardboard box, but Logan took the time to paper mache it and cover it with crepe paper (using this blog as a reference). I think it turned out amazing!


Next, by Lucy's request, we played pin the head on the mini-fig. I doctored up this printable so the kids could draw their own faces. I think it was my favorite part. So cute!


Next presents, and then decorating cupcakes! We used yellow frosting and had m&ms and licorice to make faces for their little cupcake mini-fig faces. It was fun -- plus who doesn't like decorating their own cupcake?


We also drew different faces on all the places. The kids loved it.

I bought some cute "party block" AKA lego treat bags at Zurchers, and filled them with matching "party block" stickers, lego candy, and these cool lego necklaces. The necklaces were a huge hit! They were the perfect little gift for these kids. Plus, the etsy seller was super accommodating and was willing to give me both pastel "friends" pieces, along with the gears and gauges (she just gave me the 9 necklaces I ordered, with a small bag filled with TONS of extra tiny pieces). I would totally buy these again.


Finally, the cake. Lucy chose everything for the cake. I think it turned out so cute! Plus it was super easy to make! It was a win-win. :) Happy birthday to my wonderful little 5 year old.

Lucy added the lego candy herself.


Wednesday, June 10, 2015

Block of the Month Quilt

Back in 2012, when I was just starting to get a little more adventurous with my quilting, I signed up for a free Craftsy Block of the Month class (and I think  you can still enroll -- so if you are interested, check it out!). It's taught by the very talented Amy Gibson. Although it took me a bit longer than the one year it was supposed to, it was a great experience, and I learned tons of sewing techniques that have helped me a lot on my other quilts (half square triangles, paper piecing, curved piecing, and quilting!)

So without further ado, here is my finished quilt!


I'm so so happy with how it turned out. Plus, it's the first quilt that I've made that I get to use for myself! :)

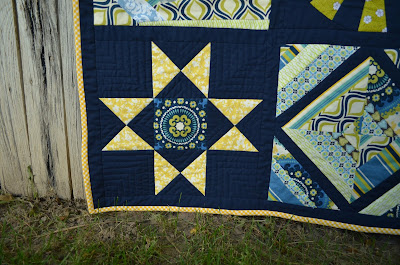
This was also the first quilt that I quilted myself! It was fun trying out the different techniques Amy showed in the class, and to think about quilting as part of the art of the quilt. It was definitely a learning experience! Although many of the blocks I did were very simple, here are a few blocks to show off some of my more intense quilting. :)


 And in case you are curious, here is the print I chose for the back!


 I'm so happy to have finally finished -- only three plus years in the making! :)


Monday, May 18, 2015

Baby girl pirate quilt!

Once upon a time I bought some amazing Sarah Jane "Out to Sea" fabric to make a baby quilt for baby girl #3. After debating which pattern to use, I finally decided on the adorable By Sea or By Land quilt pattern. After painstakingly cutting out all the curved pieces, I was finally ready to start sewing! Then, my worst nightmare happened: little Chi found my fabric scissors and shredded all the fabric. Worst. Day. Ever. She cut every single piece. I had to completely start over. :(

The pink narwhal fabric looked like a snowflake.

So, after buying more fabric, having Sarah Jane herself mail me more fabric (so amazing!!!!), re-cutting all the fabric, having to re-imagine the back since I now had so many scraps, I was finally able to sew, quilt, and bind it! And all with 5 weeks to spare before baby is born! Woot!

So without further ado, here is the finished quilt!

The front!

Close up of the appliqued ship

I ended up doing a much different quilt back then I originally intended since I had so many random pieces of fabric left over. I did some paper piecing to make a nautical star with my smallest scraps, and patchworked the rest. I think it turned out pretty cute!

The back!


Close up of the nautical star

I'm so happy with how it all turned out. Hopefully baby will be here to enjoy it soon! :)

Wednesday, March 4, 2015

Baby gifts!

I've been pretty bad at posting my random projects lately, so here are a bunch of the baby gifts I've made in the past 6 months. Hopefully this will help inspire YOU to give a handmade baby gift!

A fabric doll to match the baby quilt I helped my friend make. I was inspired by these amazing dolls. They are so cute, and pretty affordable. Frankly, after making one and seeing all the effort it took, I may just buy one next time. I especially love the pirate one. Oh my goodness.

Luz holding the doll so you can see the scale.

I made a reversible skirt to show off more the matching fabric from the quilt.


A denim whale for my cousin's baby boy (tutorial found here). I am so happy with how it turned out. I may have to make another one soon!


Chi was sad to give it away!

 My sister came to town late last summer as she was moving to Portland, so I whipped up a new little toy for her baby with some scraps I had on hand! The middle is a soft fleece with crinkley stuff inside. I made it with bright colors and different textures for him to play with/chew on, and made the arms long enough so they would be easy for his cute little hands to grasp.

 
He gave his seal of approval!

Finally I made a couple of little drool bibs and matching headbands for a new baby in our neighborhood (modeled by Chi). I made these bibs with an absorbent cotton jersey fabric, and backed them with fleece, so they (hopefully) won't leak onto the shirt below. I've never used them on my own kids, so I hope they work! :)


I just found out I'm having another baby girl -- due the end of June! So stay tuned for some more girly crafts/quilts in the near future! :)

Friday, January 9, 2015

Rapunzel Dress!

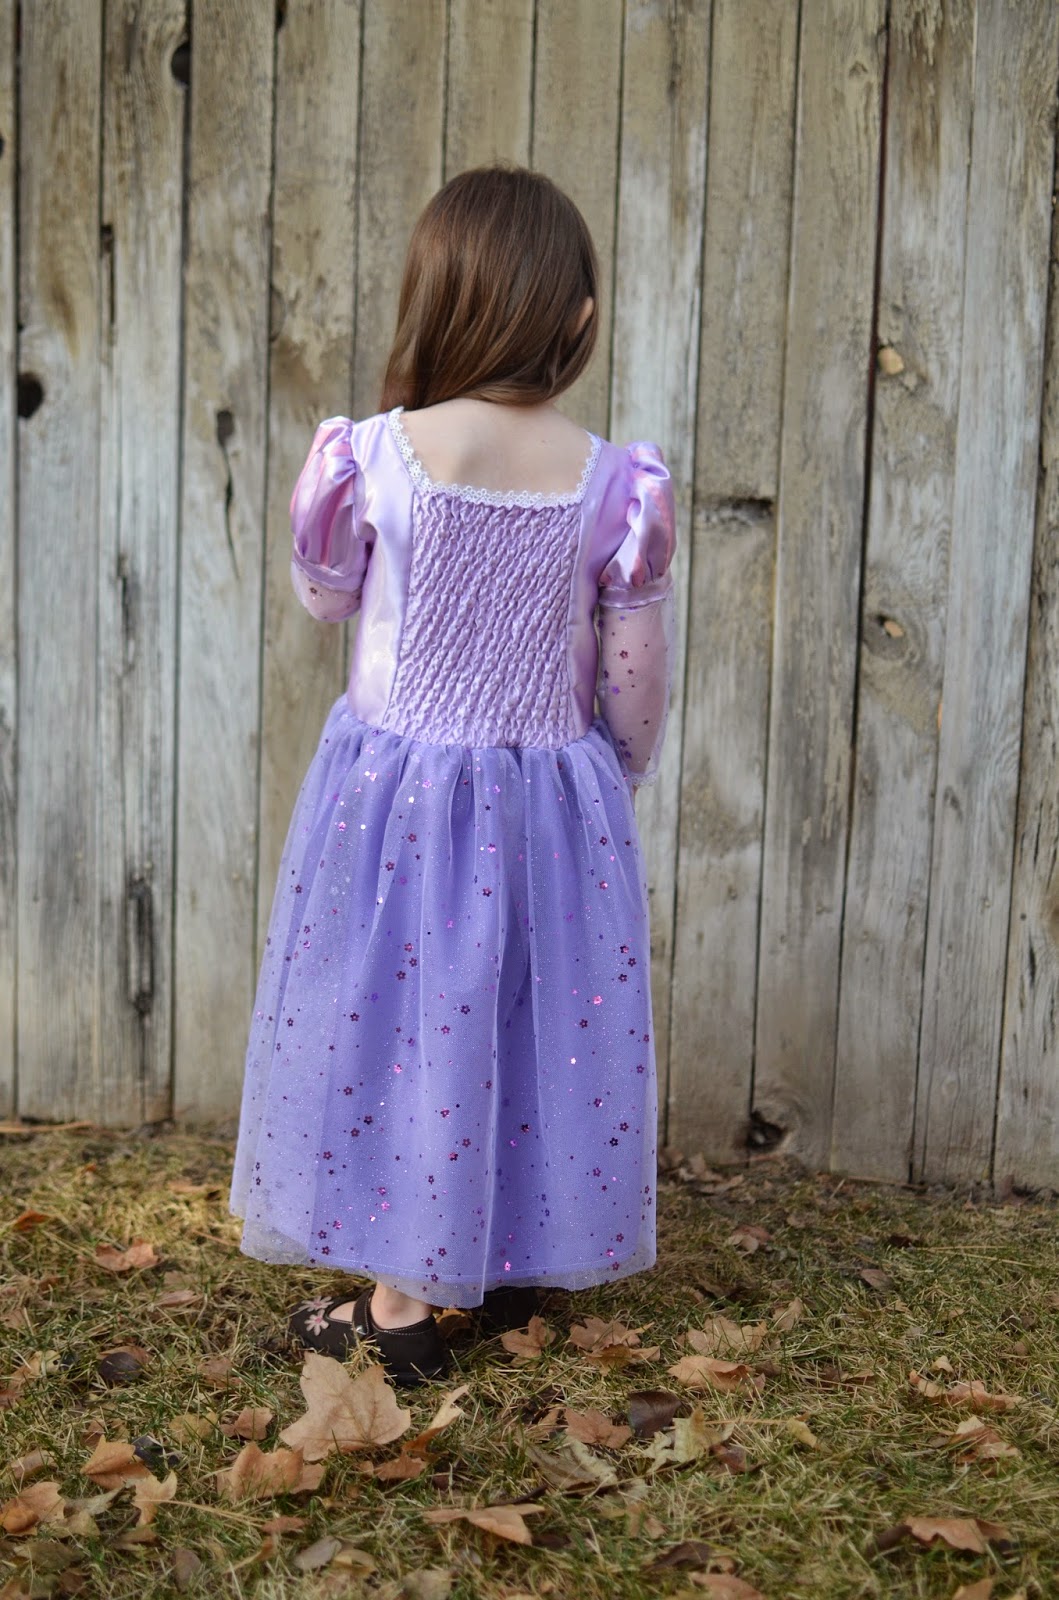
As I was talking to my girls about Christmas, they both told me that they wanted a princess dress! I knew I wanted to get an Elsa dress for Chi, and Luz told me she wanted a Rapunzel dress. After looking at Target and Amazon, I decided on this dress for Chi (I do not regret it -- it's great!). But Rapunzel. *Sigh* NONE of the dresses I found (not even the expensive ones!) looked ANYTHING like the dress in the movie. So, I decided to make her one. 

I based my dress off of this tutorial from Make it and Love it, this tutorial from Homemade Toast, and the look of this Simplicity pattern. Bascially, I like the look of the pattern (but am too cheap to pay $15 for a pattern), the details in the Make it and Love it tutorial, and the comfort of the Homemade Toast dress (more on that later). Here is what I came up with:  =)


 Here is the comfort part. Most dresses have a zipper (which I am secretly afraid of sewing anyway...) but the Homemade Toast dress used shirring. Have you ever tried it? Basically you sew with regular thread on top, and elastic thread in the bobbin. Then you sew row after row until you have a nice stretchy swatch of fabric! Easy, and comfy. Just like little girl dresses should be.


I am so happy with it!  And Luz loves to twirl in it!


Since Luz knew all about the dress (I made her try it on many times to check fit), I wanted her to have a little surprise on Christmas morning, so I made a matching dress for her doll. Nothing fancy. I shirred a little swatch of fabric for the bodice, and a little tube for the skirt. For the sleeves, I just used some pink elastic I had as little straps, and tied a little bow at the neck to match Luz's lacing. Easy. And who doesn't love being matchy-matchy with their doll?


I love this little Rapunzel!!!

Part princess, part goof ball!