Friday, June 7, 2013

Elephant quilt!

My sister had her baby!  Hooray!

Now I can finally show off the elephant quilt I made for darling baby Leah.  =)


Close up of the embroidered name.

Good thing they didn't do a last minute name change! =)

Here is a close up of the binding and the backing of the quilt.


Close up of the appliqued elephant.  I just used a zig-zag stitch on my sewing machine.  I hand embroidered the eye (with woven wheel stitch) and the tail (simple back stitch). It's hard to tell from the picture, but I also hand quilted around the elephants, so I didn't have to place a tie in the center of the block.


Here is the little elephant friend I made with the scraps.  I ended up doing a patchwork because I had so few scraps left!  Dang my mathematical brain and buying only the exact about of fabric I needed! =)  Check out this post for a tutorial to make your own elephant!


I'm so sad I can't be there to snuggle with sweet baby Leah!  At least she has my quilt to snuggle with! 

Tuesday, June 4, 2013

Elephant stuffed animal tutorial (with pattern)!


So, as I have said in previous posts, I just made (and mailed!) a little present for my new neice due any day (actually due yesterday =P)!  I am waiting until she is born to reveal the quilt in it's entirety (check out the matching quilt here!), but here is the stuffed elephant I made to match!  Soft minky on one side,  a patchwork of bright colors on the other.  Floppy ears perfect for the little hands to grab!  I'm loving it!

Do you want to make one too???


Materials: A bunch of small scraps pieced together at random or 1/3 yard of printed cotton fabric (for body)
                  6" of a coordinating printed cotton fabric (for ears)
                 1/3 yard minky (for ears and body)
                 Embroidery floss (for braided tail, and eye)
                 Stuffing

Time:        One evening, two long naps


I made a patchwork with my leftover scraps for one side of the elephant.  It was soooo easy.  Just sew a few pieces together, cut a line with your straight edge, and sew a few pieces onto your new straight line.  Don't have any scraps? Or don't want to worry about sewing a patchwork? Never fear!  Just use fun patterned fabric instead.  It turns out just as cute.

Print out pattern with page margins set to zero.


Cut out your fabric pieces.  Make sure you flip over your pattern after you cut out the printed cotton body, so that the minky is cut out the other way, like is shown below.  Same for the ears.  Cut out one minky and one cotton ear, then flip over the pattern, and cut out another minky and anther cotton ear. 

All of my pieces cut out. I'm ready to start sewing!
Sew the ears together with 1/4" seam allowance.  Put one printed ear and one minky ear right sides together and sew around the curved part.  Leave the end of the ear open so you can flip it right side out.


Flip ears right side out.  Transfer markings from pattern to ear for the pleats, on the outer side of the ear, only.


Fold the outer dots in to line up with the center dot (with both layers of fabric) -- pin in place. 


Sew pleats with 1/4" seam allowance. Whew.  Ears are done, and ready to be sewn onto the body!


If you want to embroider eyes, now is the time to do it!  For the eyes, I used the woven wheel embroidery stitch.  It's actually a lot easier and quicker than it looks. I think it makes perfect little eyes.  If embroidery scares you, try a button, or nothing at all!  It will be super cute either way!

Pin one ear on each side of the elephant, line up ears as shown on pattern. 


Sew ears onto each side of the elephant with a 1/4" seam allowance.


I braided embroidery floss to make a cute little tail.  Sew tail onto one side of the elephant, with a 1/4" seam allowance.


I really thought I took more pictures of the last steps, but I guess I didn't. =P Sorry!

Pin both sides of the elephant right sides together.  I pin A LOT when I use minky, since minky is stretchy and slippery.  Sew together with 3/8" seam allowance (to make sure you hide your previous 1/4" seams).  Leave a 2"-3" gap along the back leg.  Clip corners and severe curves so that it will lay flat when you flip it right side out (not sure what that means? Check out my Jellyfish tutorial).

Fill with stuffing until fairly firm, and hand-stitch the opening closed.   Ta da!  You are done!


Thursday, May 9, 2013

In the mail...

I sent a fun little package to my sis this week.  I can't wait for little baby girl to make her appearance!

Here is a little sneak peak of the quilt and softie I made for my new little niece.  More pics and a tutorial to come!


And I couldn't resist making her some funky little baby booties!


 Hooray for new little babies to craft for! =)

Monday, April 29, 2013

Baby shower!

Since I have two little girls, I am getting better and better at making presents for baby girls!  My cute friend Beckee just had a shower, and I had to make her some fun little girl things!

Chi was my awesome model! =)

First up: Ballet shoes onesie!  I followed the tutorial by Make it and Love it found here.  It's super fast and easy. Once I picked out my fabric and ribbon, it took me about 1/2 hour to finish.


Next up: Little baby booties.  I bought a pattern to make these here.  The pattern is super easy to follow with tons of pictures, and patterns for sizes 0-12 months.  Even a beginner sewer could follow this pattern! If you don't want to pay for a pattern, you can find other free tutorials online like this one  or this one.  Oh, and Chi just naturally posed like this.  Future ballerina?  =)

Don't you just love chubby baby legs???

I modified to laces a little bit from the pattern I bought.  After testing out many baby shoes, I found that hardly any actually stay on those little kicking feet.  So, I added a little tab in the back and threaded the laced through to tie them up ballerina style.  They passed the test! Chi kicked and kicked and kicked, and they stayed on!  Woot!

Here you can see the tab I sewed onto the back of the shoe

The problem with making shoes, is you have to make two, so it takes a little bit longer. =)  These took me about one hour.


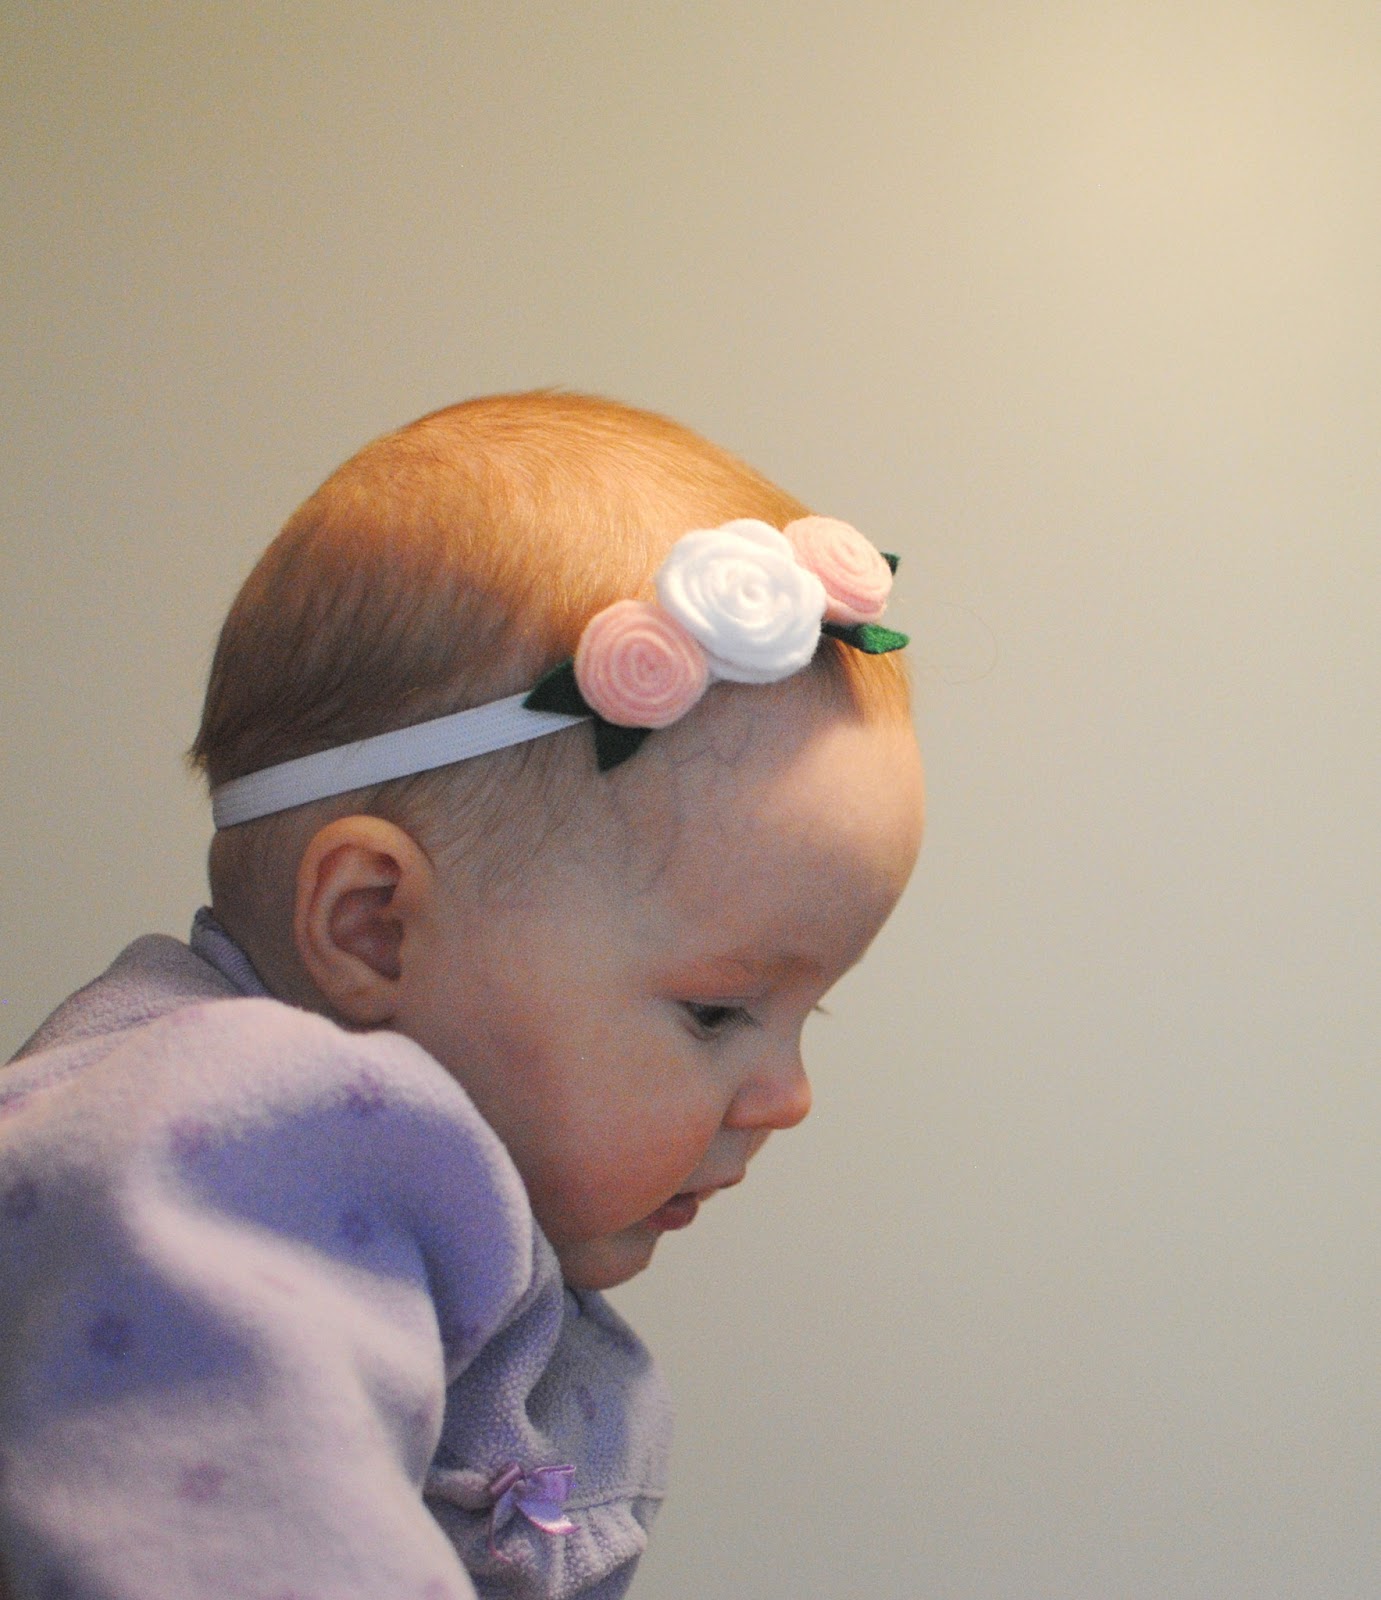
Lastly: A little girly headband!  These rolled felt flowers are SOOO easy to make!  See how to make them here. This probably took me about 15 minutes (not counting the half an hour it took for me to decided how to place them on the headband. =D).

Feel free to copy my placement.;)


Now go!  Make a cute little homemade gift for your next baby shower!

Thursday, April 18, 2013

How to make Continuous Bias Binding


Have you seen the bias tape tutorials where you have to cut out long strips of fabric and sew them together piece by piece?  Doesn't that sound tedious? This method is WAY easier and takes much less patience! =)


Materials:  I used 5/8 yard of fabric to bind my 40"x48" baby quilt
Time:         One evening (or one long nap)


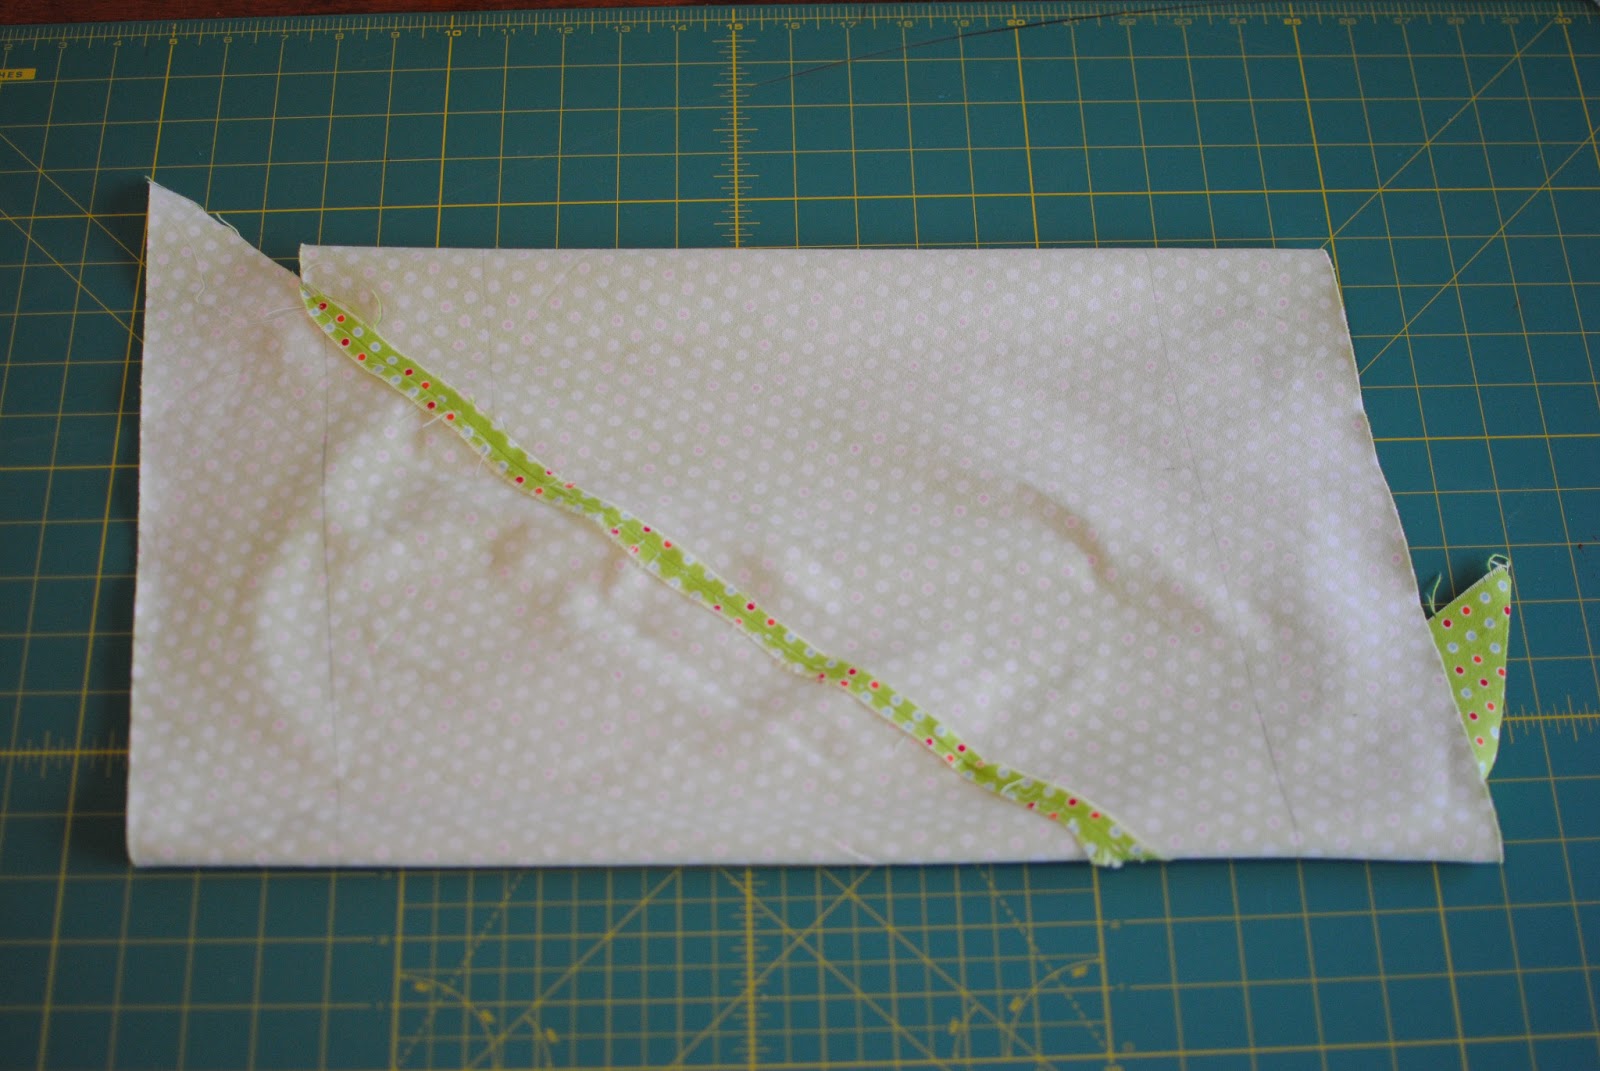
Lay out your fabric and fold it into a parallelogram, finger press the folds.


It's very important that you remember which way is "up" on the fabric.  You don't want to accidently sew the wrong sides together, and end up with a binding on the straight instead of on the bias.  Before you cut the fabric, you may want to draw little arrows on the back of all three sections (the two triangles and the parallelogram), so you don't get confused later.


Trim off the two triangles along the crease.  Save these pieces!***


Or, if you know you will need all the fabric for the binding (like I did for the baby quilt), simply cut off one triangle, and sew it onto the other side, to form a larger parallelogram.


With a pencil, draw a line on both sides of your parallelogram that is the total desired width of your bias binding.  I did 3" for mine, so I would end up with a 1.25" binding (3" folded in half = 1.5", 1.5"- 0.25" seam allowance = 1.25" binding).


Now with right sides together, line up the bottom pencil line with the top corner, and pin together.  Notice that is does not lie flat when pinned.


Sew together with a 1/4" seam allowance. 


Press seam open.  You should now have a tube.


With a straight edge and rotary cutter cut your 3" binding slowly making your way around the tube.


It probably won't turn out even, so don't worry if the end looks like this:


Now you have a whole pile of biased binding! So simple.


And so cute! =)


***If you end up needing more binding, simple sew the two triangles together to form another parallelogram, and repeat the process!  Make sure the arrows you drew on the triangles are both pointed up!


Tuesday, April 2, 2013

Jellyfish Toy/Mobile Tutorial


Chi loves ribbon.  I have a couple of tag toys for her, but she is not convinced.  She wants the loooong ribbon.  So, I came up with this little jellyfish softie!

She loves it!  She loves to munch on the long ribbon, and stare at the bright colors.  It was definitely a win.


Do you want to make one too???

Materials: Scraps from my stash
                  LOTS of ribbon
Time:        Two evenings, and one nap


I wanted the jellyfish to be a half circle, and remembered this amazing tutorial from Make it and Love it for a darling little turtle.  Feel free to make a little turtle friend for your jellyfish! =)


I used those pattern pieces (found here -- just scroll down for the turtle pattern pieces, and cut out the "shell" and "base") to make the body of my jellyfish. I scaled mine down a little bit.  My circle ended up being 6" in diameter.  It's a great size for my little 6 month old.

Sew two of the triangles together along one side only. Repeat with other two triangles (as shown in the turtle tutorial). Sew the two half shells together.  When I pinned the two sides together, I also pinned in a short piece of looped ribbon where all four pieces of the shell come together.  This created a little tabby thing so I could hang the jellyfish up (like as a mobile). You can see the tab in the picture below.  It should look a little like this:


You can see in the above picture, I cut out some long strips of fabric to make the wavy things at the base of the jellyfish.  Oh, and I'm pretty sure "wavy thing" is the technical term.  Ha!

The width of the strips are 2" from the top of the wave to the straight edge.  The length of the strips will be the diameter of your circle times Pi plus 0.5" for seam allowance. So, since my diameter was 6", the length of my strips will be:
                                        6" x 3.14159  =  18.85" + 0.5" = 19.35" total length.
Does that equation sound a little familiar? The circumference of a circle = PI*diameter. See?  Math does come in handy sometimes! =) 

Cut out the two strips and sew along the waves right sides together with a 1/4" seam allowance.  You have to go kind of slow to sew all the curves on your sewing machine.  However, it went together WAY faster than I thought it would -- so try it!

Clip the hills and valleys every so often (make sure you don't clip through the seam!) to help it flip inside out more easily.

www.makebyenginerds.com

Open up the ends and pin right sides together (to form a ring).


Press the seam open, and fold right side out.


Now your seam is enclosed!


Now pin the wavy strips onto the shell, and add as much ribbon as you would like.  The longest ribbon I cut was about 9" -- I didn't want this to be a strangulation hazard!


Sew 1/4" seam allowance around the shell.  I added a zig-zag stitch for some extra reinforcement.  Then I put an elastic around all my ribbon to gather it all together.  I didn't want to accidentally sew the loose ends of the ribbon to the bottom!


Next pin on the bottom piece and sew around using a seam allowance slightly larger than a 1/4". Don't forget to leave an 1.5" gap so you can flip it right side out!


Add stuffing and sew the gap shut by hand.  Voila!  You have made a darling jellyfish!


I'm really tempted to make a few more and make a jellyfish mobile!  It's pretty mesmerizing! =)