Showing posts with label baby. Show all posts

Saturday, April 9, 2016

Les Amis baby quilt and cloth book for Ezra!

We added a new nephew to our ever growing brood! So that means I got to sew another quilt. I am so happy with how this quilt turned out. My sister lived in France, and speaks French, so of course we used a few fabrics from the Les Amis collection by Patty Slongier. So darling. I used the Arrow Tail pattern found here. The pattern was easy to follow and although cutting took a while, the quilt actually sewed up pretty fast.

Front
 I even decided to branch out from my usual tied quilts, and machine quilted this one. I love the added dimension it gave the quilt.

Front detail

Back


Back detail -- notice the French!

Trees, all sorts of forest animals, rich blues and greens, and fluffy. Perfect for a baby boy. <3 (Notice I have to live vicariously through my sisters for baby boys) :)

Ready to mail!
.
.
.
.
.
.
.
.
.
.
.
.
.

Now wait! Aren't you wondering what matching gift I came up with for the baby? Since my sister loved the French on the quilt ("Les Amis de la Foret"), I decided to make a little cloth book with French labels for sweet baby Ezra to read. I'm not going to lie -- I LOVE how it turned out. Probably one of my favorite matching gifts ever. Plus it was great practice: machine quilting (on curves, no less!), embroidery, applique, piecing, paper piecing (Butterfly pattern found here), and tiny piecing. It was time consuming, but so fun to make. Plus, as an engineer, I love finding a use for the small leftover scraps. I like to be as efficient as possible. :)


Monday, May 18, 2015

Baby girl pirate quilt!

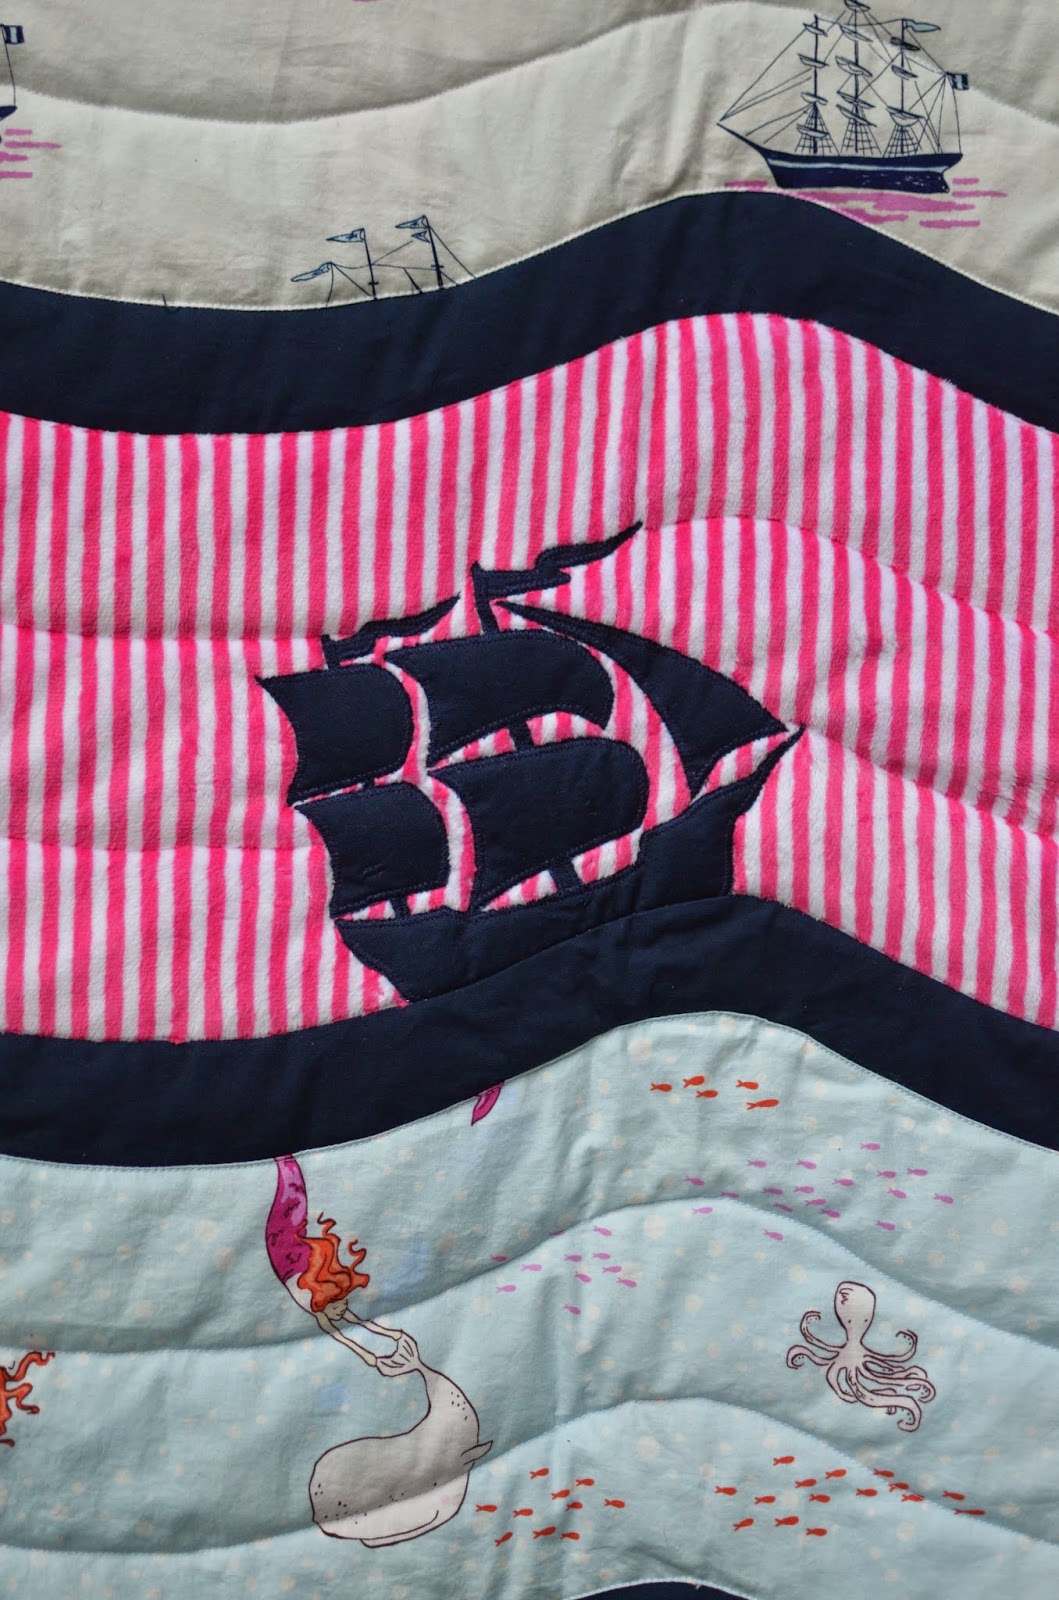
Once upon a time I bought some amazing Sarah Jane "Out to Sea" fabric to make a baby quilt for baby girl #3. After debating which pattern to use, I finally decided on the adorable By Sea or By Land quilt pattern. After painstakingly cutting out all the curved pieces, I was finally ready to start sewing! Then, my worst nightmare happened: little Chi found my fabric scissors and shredded all the fabric. Worst. Day. Ever. She cut every single piece. I had to completely start over. :(

The pink narwhal fabric looked like a snowflake.

So, after buying more fabric, having Sarah Jane herself mail me more fabric (so amazing!!!!), re-cutting all the fabric, having to re-imagine the back since I now had so many scraps, I was finally able to sew, quilt, and bind it! And all with 5 weeks to spare before baby is born! Woot!

So without further ado, here is the finished quilt!

The front!

Close up of the appliqued ship

I ended up doing a much different quilt back then I originally intended since I had so many random pieces of fabric left over. I did some paper piecing to make a nautical star with my smallest scraps, and patchworked the rest. I think it turned out pretty cute!

The back!


Close up of the nautical star

I'm so happy with how it all turned out. Hopefully baby will be here to enjoy it soon! :)

Wednesday, March 4, 2015

Baby gifts!

I've been pretty bad at posting my random projects lately, so here are a bunch of the baby gifts I've made in the past 6 months. Hopefully this will help inspire YOU to give a handmade baby gift!

A fabric doll to match the baby quilt I helped my friend make. I was inspired by these amazing dolls. They are so cute, and pretty affordable. Frankly, after making one and seeing all the effort it took, I may just buy one next time. I especially love the pirate one. Oh my goodness.

Luz holding the doll so you can see the scale.

I made a reversible skirt to show off more the matching fabric from the quilt.


A denim whale for my cousin's baby boy (tutorial found here). I am so happy with how it turned out. I may have to make another one soon!


Chi was sad to give it away!

 My sister came to town late last summer as she was moving to Portland, so I whipped up a new little toy for her baby with some scraps I had on hand! The middle is a soft fleece with crinkley stuff inside. I made it with bright colors and different textures for him to play with/chew on, and made the arms long enough so they would be easy for his cute little hands to grasp.

 
He gave his seal of approval!

Finally I made a couple of little drool bibs and matching headbands for a new baby in our neighborhood (modeled by Chi). I made these bibs with an absorbent cotton jersey fabric, and backed them with fleece, so they (hopefully) won't leak onto the shirt below. I've never used them on my own kids, so I hope they work! :)


I just found out I'm having another baby girl -- due the end of June! So stay tuned for some more girly crafts/quilts in the near future! :)

Sunday, April 27, 2014

T-rex Dinosaur Softie Tutorial and Pattern!


Remember how I'm way too nice and always sew a matching something-something for the quilts I make? (See the Robot, owl, bunny, doll quilt,  elephant, and butterfly for a refresher! =D) Well, when I made the dinosaur quilt for my new nephew Issac, I knew that I would get to make a cute little dino softie to match! 

After searching the internet extensively, I couldn't find a single pattern/tutorial of a dino that I like well enough to use. So I decided to make my own! And since I had to make up a pattern for me to use, I decided to share it with all of you!

Materials: About 1/4 yard of printed fabric
                  8"x8" scrap of minky (for the belly and bottoms of the feet)
                  18" coordinating 1/2" rick rack
                  Stuffing

Time:        Two evenings, one long nap

***Seam allowance is 1/4" unless noted otherwise.***

Print out pattern with page margins set to zero.


Cut out all of the pattern pieces. I raw edge appliqued the little red polka-dots to the body to make it match the quilt a little bit better -- they are definitely optional!


2. Pin two of the leg pieces right sides together and sew along both long edges to make a tube. Then  pin the round foot piece to the bottom tube of the leg and carefully sew around the circle. Repeat with other leg. Honestly this is the very hardest part -- the rest is smooth sailing! =)


3. Pin two of the arm pieces right sides together and sew all around the long sides and the bottom. Flip both the arms and the legs right side out and stuff. I used a few stuffing pellet bead thingys in the bottom of the hands and feet to add weight so they would hang down better, but this is totally optional.


4. Sew the inside "V" of the body closed with right sides together. This creates a rounder shape for the body.

5. Pin the belly to the sides/tail of the dino and sew together. 


6. Sew the side of the head to the long strip.


7. Pin and sew the other side of the head to the long strip. Cut off any extra length of the strip.


8. Pin each leg to the minky belly so the edge of the leg is about 1" from the side seam. Sorry this is hard to see -- the legs are hidden inside!


9. Pin the bottom circle to the body/belly of the dino (sandwiching the legs) and pin the tail together. Sew about 1" of the tail that is closest to the bottom to complete the circle opening of the body before attaching the bottom. Does that make sense? Leave the rest of the tail open for now. Sew the bottom circle to the body.


10. Pin each arm to the body (about 1/4" from the edge of the minky belly). Pin the front of the head to the belly right sandwiching the arms in place. Sew the front of the head to the belly, leaving the sides open.


11. Sew a piece of rick-rack along the right side of the fabric down the center of the rick-rack a scant 1/4" away from the edge of the fabric (that way when you sew the seam together with a 1/4" seam these stitches won't be visible).


This is how it will look on the outside!
12. Pin and sew the entire tail together leaving a 2" gap on the bottom of the tail so you have room to flip right side out, and stuff! The inside will now look like this:


13. With right sides together (completely inside out) carefully pin and sew the back of the head onto the back.


14. Flip right side out and stuff. Like the arms and legs, I also put a handful of the stuffing beads in the bottom to help the dino sit upright, but that is optional. Hand sew the gap in the tail closed.


15. You are done! Enjoy your cute and huggable little t-rex!


Make It and Love It

Thursday, April 3, 2014

Dinosaur quilt!


My sister Cali came and visited during the last week of February. We went shopping together to choose the fabric for a quilt for her baby Issac -- and about one month later --  I present you with the finished quilt!  It's a new record! 

I love, love, love how it turned out! I think it's my favorite quilt so far.


The big dino squares are all hand embroidered, and then hand quilted so a) I wouldn't have an awkward tie in the middle of the dinosaur, and b) to give the dinosaur a little more dimension.


Obviously I really love my sister (and baby Isaac)! =)

Dino back!

And, yes, I made yet another matching stuffed animal. Stay tuned for the pattern/tutorial for this huggable t-rex!